Adding a scar to your drawing can give a character so much more life, a past, or a story that just waits to be told. It is, you know, a way to show a character has been through something, making them feel a lot more real to anyone looking at your art. Whether you are aiming to create a battle-worn hero or perhaps a quiet figure with a hidden past, the way you show a scar on their skin can speak volumes without needing any words.
Learning how to draw a scar that feels genuine, that truly seems to sit on someone's skin, involves a bit of observation and, so, a bit of practice. It is not just about putting a line on a face or an arm; it is about thinking about what kind of mark it is, how old it might be, and what it might have come from. A fresh cut looks very different from an old, faded mark, and each one tells its own little tale.
This guide will walk you through some simple ideas for making these marks look believable, helping you add that extra layer of depth to your creations. We will look at different types of marks and, in some respects, how light plays across them, giving you some good starting points for your own artistic endeavors. Anyway, let us get started on making those characters feel even more alive.
- Kinchana Ding Ding Ding Song
- Laufey Fortnite Emote
- Esposa De Mil Mascaras
- Itsame Yomama Nude
- Andie Rosafort Husband
Table of Contents
- What makes a scar look real?
- How do you start to draw a scar?
- Exploring Different Kinds of Scars
- What tools help with how to draw a scar?
- Adding Depth and Story to Your Scar Drawings
- Are there quick ways to draw a scar?
- Practicing Your Scar Drawing Skills
- How to draw a scar - A Look at Character Scars
What makes a scar look real?
To make a scar truly seem like it belongs on a person, you have to think about a few things that give it its own feel. One big part is the way it sits on the skin, you know, whether it is raised up or, perhaps, pulled inward. This surface quality, or what we call texture, is pretty important. A mark that is still quite new might be a bit red and, typically, a little puffy, while an older one could be paler, maybe even a little shiny, and sometimes a bit flat against the skin. You want to show these small differences in your drawing, making sure the line you draw is not just a flat mark but something with a bit of dimension to it. It is like, you are not just drawing a line, you are drawing a tiny landscape on the skin.
Then there is the color. A fresh mark often has a bit of a pink or reddish tint, especially around the edges, because the skin is still healing. As time goes by, this color fades, and the scar might become lighter than the skin around it, or perhaps, in some cases, a little darker. Sometimes, you will see a subtle change in hue, a sort of purplish or brownish tone, depending on the person's skin and the type of injury. You want to pay attention to these color shifts. Also, how light hits the scar matters a lot. A raised mark will catch the light differently than the skin around it, creating small shadows or highlights that really make it pop out, or, conversely, recede. This interplay of light and shadow is what gives the scar its form and, as a matter of fact, helps it look like it is truly part of the body.
How do you start to draw a scar?
When you are just beginning to figure out how to draw a scar, it is often best to keep things pretty simple at first. Start with a basic line or shape that suggests the overall path of the mark. Do not worry about all the small details right away. Think about where the scar is located on the body and how it might curve or stretch with the skin. For example, a mark on an arm might follow the direction of the muscle, while one on a face could follow the lines of expression. You could, in a way, just sketch out a faint line to get the general idea down.
- Did Legend Die
- Mac And Devin Go To High School Knees Down
- Gourmia Air Fryer Recalls
- Carson Shearer Dance
- Dti Embraced By Lace
Once you have that basic shape, you can then begin to build on it. Think about the edges of the mark. Are they sharp or soft? Is the scar wide or thin? You can add very light shading along one side of the line to suggest that it is raised, or, on the other hand, shade slightly inside the line to make it look sunken. This is where you start to give the scar some body. You are basically building up the look of the scar bit by bit, adding more detail as you go. For instance, if you are working on a burn mark, you might want to create a more irregular shape with, you know, some bumpy areas to show the damaged skin. It is all about gradual additions to make it look real.
Exploring Different Kinds of Scars
Scars come in many varieties, each with its own look and story. There are, for example, the marks left by a burn, which often appear as areas of skin that are puckered or perhaps a bit shiny, sometimes with a very irregular edge. These can range from small, discolored patches to larger, more textured areas. Then you have older surgical marks, which tend to be thin, straight lines that have faded over time, often becoming a pale color that is lighter than the surrounding skin. These often look, you know, very neat and tidy, almost like a thin thread running across the skin.
Consider also the marks from old injuries, like cuts or scrapes, which can vary a lot. Some might be jagged and wide, showing a rough healing process, while others could be quite subtle, just a faint line that is barely noticeable unless you look closely. Each type of mark has its own character, its own way of sitting on the body. You might also encounter marks that are raised and thick, known as keloids, which can look like a rope or a raised ridge on the skin. Looking at pictures of different kinds of scars, perhaps on a site like Pinterest where you can find ideas for how to draw a burn scar, can really help you get a feel for how varied they can be. This kind of research is, honestly, a good way to improve your drawing.
What tools help with how to draw a scar?
The tools you use can make a real difference in how you approach drawing a scar. If you are working with traditional materials, a simple pencil and paper are, of course, all you truly need. Different pencil hardnesses can help you create lighter or darker lines, and a good eraser can be used to lift color and create highlights, making the scar seem to catch the light. You might want to experiment with charcoal or pastels too, as they can give a softer, more blended look, which is useful for older, more faded marks. Basically, any drawing tool you feel comfortable with can work, it is more about how you use it.
For those who prefer working on a screen, there are many digital options that can make drawing scars quite simple. Applications like the free online drawing application, which is good for all ages, allow you to create digital artwork and, you know, share it online or save it in common picture types like JPEG or PNG. This kind of program lets you easily draw, or even change photos. You can, for instance, craft images for social media posts or digital ads. Some apps even let you make quick picture changes with a drag and drop feature, or, perhaps, use shortcuts like drawing the letter “s” to get to a style chooser. These tools give you a lot of flexibility to play with color, texture, and light, which is really helpful for making realistic scars. You can, for example, get everything you need to know about Sketchpad, and even watch videos for advice on how to use it and get the most from the application.
Adding Depth and Story to Your Scar Drawings
A scar is more than just a mark; it is a piece of a character's history, a little visual story. When you are drawing one, think about what it means for the character. Where is it placed? A mark on a hand might suggest a struggle, while one on the face could indicate a past conflict or a defining moment. The position of the scar can tell a lot about what happened to the person. You know, a scar on the back of the neck might be from something entirely different than a scar on the forehead. It is about giving the mark a reason for being there, a bit of context.
Consider how the scar affects the character's expression or movement. Does it pull at the skin when they smile, or cause a slight tilt of the head? These small details can add so much to the believability of your drawing. Also, think about the age of the scar in relation to the character's age. An old mark on a young person might suggest something happened early in their life, while a fresh one tells a more recent tale. You are, basically, using the scar to add layers to your character's personality and background. It is like, you are giving them a secret language that only their body speaks, which is pretty cool.
Are there quick ways to draw a scar?
Sometimes, you need to add a scar to your drawing without spending a lot of time on it. Digital drawing applications often have features that can help with this. For instance, some programs let you set up tool presets, which are like pre-made brushes or settings that you can quickly access. You might, for example, hold a button and then tap the screen with different finger combinations to get to these ready-to-use tools. This can be super handy for quickly adding a specific type of mark, like a quick, thin line for a healed cut, or a more textured brush for a burn. It is a bit like having a shortcut for drawing a scar, so you do not have to build it from scratch every time.
Another quick way is to use very simple shapes and lines and then just hint at the details. Instead of drawing every tiny wrinkle or discoloration, you could just suggest them with a few well-placed strokes. For example, a simple, slightly curved line with a bit of faint shading on one side can often be enough to suggest a raised scar. It is about implying the detail rather than drawing every single bit of it. This method relies on the viewer's imagination to fill in the rest, which, honestly, can be just as effective as drawing every detail. You are, in a way, giving them just enough information to understand what they are seeing.
Practicing Your Scar Drawing Skills
Like anything in drawing, getting better at how to draw a scar really comes down to practice. The more you try, the more comfortable you will become with different shapes, textures, and the way light interacts with these marks. Do not be afraid to experiment. Try drawing the same scar in different ways, maybe on different parts of the body or under different lighting conditions. You might, for example, try drawing a faint, old mark one day, and a fresh, more pronounced one the next. This kind of varied practice helps you build a wider range of skills.
Looking at references is also a big help. You can find many ideas about how to draw a burn scar on sites like Pinterest, or just by observing how marks look on real people or in movies and shows. Pay attention to how artists in your favorite works depict these marks, and think about what makes them look convincing. Some artists have a very distinct way of drawing these kinds of marks, and, you know, drawing scars can depend on one's personal style. You could also look for printable drawing lessons, perhaps a PDF that includes step-by-step instructions. Some of these even come with coloring book pages that just have the outlines, giving you a chance to practice shading and color. This kind of resource is, actually, a great way to get started and keep improving.
How to draw a scar - A Look at Character Scars
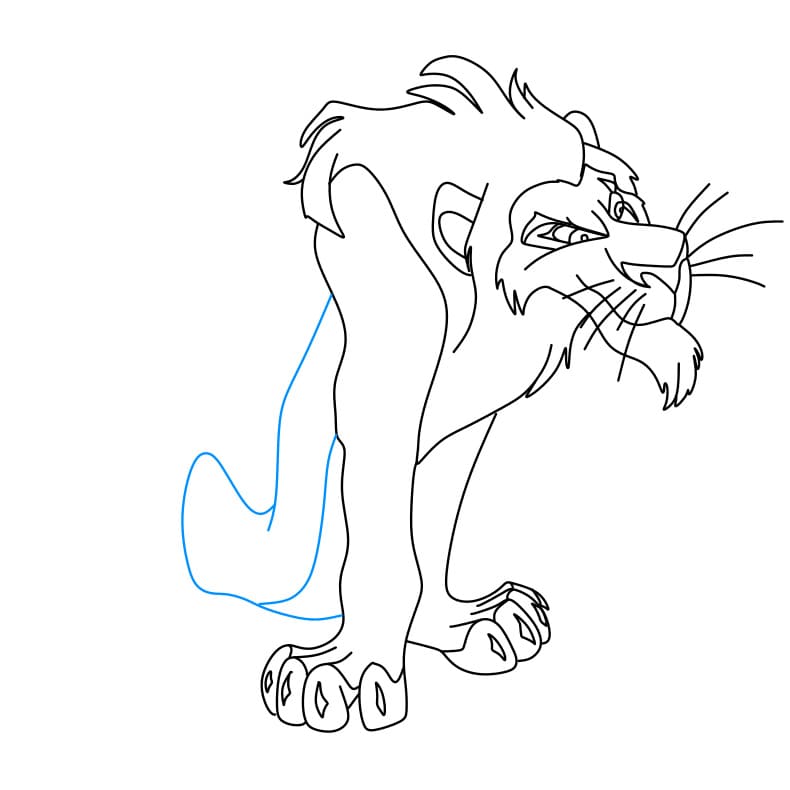
Sometimes, when people talk about how to draw a scar, they might be thinking about specific characters from stories or films who have very famous marks. For instance, you could be looking to learn how to draw Scar from the Lion King, a character whose mark is a key part of his look and story. Drawing a character's specific mark means paying close attention to its unique shape, its placement, and how it contributes to that character's overall appearance and personality. It is not just a random mark; it is a defining feature. You are, in a way, drawing a piece of their identity.
When drawing a character's scar, you want to capture the feeling it gives off. Is it meant to look menacing, or perhaps sad? Does it show wisdom or pain? The way you render the scar, from its texture to its color, can really help convey these emotions. For example, if you are drawing a villain's mark, you might make it look sharper, perhaps a bit more stark, to emphasize their nature. It is all about making the mark serve the character's narrative. So, whether it is a generic injury or a well-known character's facial mark, the principles of making it look real still apply, just with an added layer of character interpretation. You are, basically, bringing a story to life on the page.


Detail Author:
- Name : Lennie O'Connell
- Username : glover.lavon
- Email : ywyman@carter.com
- Birthdate : 1998-12-14
- Address : 16445 Reynolds Via Ryanmouth, UT 88084-0208
- Phone : 502.722.1036
- Company : Stokes-Considine
- Job : Marine Engineer
- Bio : Quasi nihil nihil tenetur impedit. Sequi quas ex enim illo voluptatem dolorem nihil maiores. Fugit adipisci et accusamus. Pariatur omnis qui et.
Socials
facebook:
- url : https://facebook.com/kokuneva
- username : kokuneva
- bio : Dolor molestiae natus debitis culpa deleniti.
- followers : 5564
- following : 2374
tiktok:
- url : https://tiktok.com/@kurtis8808
- username : kurtis8808
- bio : Voluptates eum assumenda ut dolorum cum repudiandae.
- followers : 1539
- following : 1510
instagram:
- url : https://instagram.com/kurtis_xx
- username : kurtis_xx
- bio : Et qui dignissimos nam impedit omnis. Et iusto et laboriosam vel.
- followers : 3477
- following : 2481
twitter:
- url : https://twitter.com/okuneva1975
- username : okuneva1975
- bio : Natus ut ex et molestias maiores. Veniam eius omnis aperiam ut accusamus quas accusantium. Aut explicabo autem voluptas expedita quia non.
- followers : 5025
- following : 2962
linkedin:
- url : https://linkedin.com/in/okunevak
- username : okunevak
- bio : Id qui omnis optio aut mollitia animi error.
- followers : 4094
- following : 2581
